Our WordPress Optimized Portal (WPO) is your one-stop-shop to access everything you need to succeed. From the moment you sign up for a fully managed WordPress service, our WPO Portal is where you’ll find all of your active services and domains listed, access to our hands on and always available support team, migration requests, backups (automated and manual), one-click staging capabilities, redirects, WordPress cloning, site traffic and usage data, DNS records and adjustments, new WordP site requests and much much more.
Here, you will find a behind the scenes look at the features offered to you through our BigScoots WPO Portal, updated regularly as we continue to roll out new features and updates!
Let’s get started, shall we?
Accessing Your WordPress Optimized Portal
Requesting a Migration
Dashboard
Traffic and Storage Usage
Notifications
2-Step Authentication
Account Activity
API Access
My Sites
Automated Staging Sites
Create FTP Accounts and View FTP and phpMyAdmin Details
Site Lock
Resources
WordPress Admin Users
WordPress Plugins
WordPress Core Automatic Updates
Cloudflare Enterprise
Admin Security Lock
Block IP Addresses
SSL
Managed Backups
Managing and Adding New Domain Redirects
Domain Nameservers (DNS) and Cloudflare (CDN)
Clear Cache – Managing Server, Browser and Network Cache
Redirects
Fix phpMyAdmin and Permissions
PHP Error Logs
PHP Settings
Collaborators
Email
Accessing Your WordPress Optimized Portal
The first step to access your WPO Portal is to sign up! Our managed WordPress plans are categorized plainly with 3 main components in mind; monthly unique visitors, storage and included WordPress installs. No matter which plan you choose, all other components such as SSL certificates, e-mail, full and completely around-the-clock hands on management, CDN, DDoS protection, proactive monitoring, backups, website staging, enhanced security, site stats and more are always included at no additional cost. Pretty sweet, right?
We understand that circumstances always change, especially in the world of explosively viral posts and seasonal traffic patterns, but we’ve got you covered. Transitioning between our managed WP plans is as simple as it gets – you only pay the prorated difference and with zero overages you are never exposed to unnecessary fees!
Choose the managed WordPress plan that’s right for you, here!
Once you’ve selected your plan and completed your initial sign up, you will receive a welcome email with your login to our Managed WPO Portal.
Requesting a Migration
If you have a WordPress site you need migrated to your managed WordPress service, your first step will be to request a migration. Migration requests are always handled entirely by a BigScoots expert crew member and guaranteed to be entirely seamless without a moment of downtime or any interruption – your migration request is started right from your WPO dashboard and is all we need to get started!
Migration requests are always handled entirely by a BigScoots expert crew member and guaranteed to be entirely seamless, without a moment of downtime or any interruption, and completed within ~90 mins.

Your migration request will primarily consist of your login to your current host as well as your WP admin login for each site you wish to migrate. The secured and organized steps will allow us to capture your login details all in one place, ensuring a seamless migration. If you get stuck even for a moment, please never hesitate to reach out to us for assistance!
Dashboard
Your WPO dashboard will give you a heads-up look at how your sites are doing, with a summarized look into your storage usage and traffic, as well as an opportunity to quickly navigate to your support tickets, migration requests, collaborators, email, notifications and backups.

Traffic and Storage Usage
Within your WPO Portal Dashboard you will find a variety of information pertaining to your service, including your site(s) traffic and storage usage.
There are two graphs that provide a visual of the last ~30 day trend of your traffic and storage. These graphs are particularly useful to track when and during what tasks your storage usage fluctuates, as well as the amount of visitors coming to your site during a specific period of time.

Notifications
Always be alert when it comes to your site through our notifications feature found at the top of every page within the WPO portal, under the bell icon.

Two-Step Authentication
Security is of the utmost priority, which is why we have added the option to keep your account extra secure with a second authentication step.
You can now very easily add on this extra step of security by clicking Edit Profile & Security directly underneath your name and email on the left hand side of the WPO Portal.

Once selecting the option to activate your two-step authentication, you will be prompted to select your authentication step. You will have the option to choose between email, the authenticator app, or an SMS.
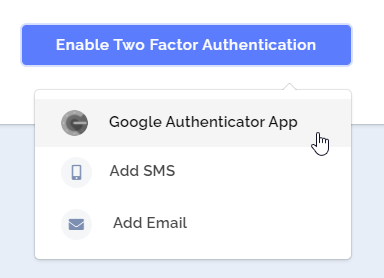
Note: If opting for email or SMS, you will be prompted to provide your email address or phone number. If opting for the authenticator app, you will be required to download the Google Authenticator app onto your mobile device and scan the provided barcode to set up your account.
Account Activity
Within your WPO portal, keep track of your account actions through the Account Activity option within Edit Profile & Security. Account activity tracks a variety of actions and can be filtered by type: Domain, Task Type, Service, User and Admin.

API Access
The WPO portal provides API access within the Edit Profile & Security section of the portal. Simply click the switch to activate API access and receive an API key.

My Sites
This page includes a complete list of your active services, WordPress sites and addon domains. With a single click you are able to create a staging site, push to live, add managed WordPress services, add new addon domains, clone an existing WordPress site, request a migration as well as view your service and site details!
From the My Sites page, you can view your cache settings, storage usage, monthly visitors, security settings, WordPress version, and PHP version. You can also take actions like: create backups, clear cache, DNS adjustments, access WP Admin, or delete site.

Automated Staging Sites
Creating a development site, otherwise known as a staging site, generally takes anywhere from 1 to 3 minutes. Speedy, I know! With just one click from your WPO Portal, you will have an exact replica of your live site in developer mode with all caching disabled – allowing you to test any new developments and changes you are implementing within your site(s) privately and securely before making them live.

Once your staging site has been created, you may access it by simply clicking on your domain from the My Sites page then changing the environment to staging. You can easily click Open WP Admin in the top right, your WP admin details will remain the same as well as provide you fresh staging specific FTP and phpMyAdmin details.

The change environment drop down allows you to toggle between your live and staging environment details at any time.
With the ability to push and pull from one environment to the other, you can push individual changes up to your live site while actively working on others with your staging site. For extra security, your staging site will be automatically locked to avoid public access and search engine indexing – restricting your sites visibility to everyone except for those that have access to your site lock username and password, including search engi
Create FTP Accounts and View FTP and phpMyAdmin Details
You will find quick and easy access to your FTP and phpMyAdmin details – just a single click away for both your staging and live environments. You also have complete control over creating new and editing old FTP accounts.

If you are interested in the administration of MySQL, you will do so within the phpMyAdmin portal. Store, access and manipulate the data stored in your relational database. Perform a variety of manipulation tools: managing databases, tables, columns, relations, indexes, users, permissions, and much much more.


Site Lock
For additional security, if you would like to lock your site for any reason you may do so within My Sites >> Click Domain Name >> Site Details.

Resources
The resource page found within My Sites >> Click Domain Name >> Resources, provides quick access to information regarding your website’s files and pages. See the total size, percentage of storage taken, file count, and percentage of count.

WordPress – Admin Users
Within your WPO Portal, you are now able to quickly and easily add WordPress Admin users. Be sure to go to My Sites >> Click Domain Name >> WordPress >> Admin Users.

Any WordPress admin user you choose to add will receive an email confirmation with their username, along with a link to create a password.
At any time, you are able to remove or edit their WordPress admin account.

WordPress – Plugins
With the use of plugins, every WordPress theme is entirely customizable. As your site continues to grow, you may need to change the functionality or scope of your site. Often times, this involves the removal or addition of plugins. From a security and performance perspective, it is also critically important you are aware of your plugin versions and update them when possible.
From within your WPO Portal, you are able to see a complete list of all active and inactive plugins on your site, along with any available updates, and their security status within the WordPress tab of My Sites under Plugins.

By simply clicking the drop down menu underneath ACTIONS, you are able to quickly and easily activate, deactivate and uninstall individual plugins. The updates button will keep you informed on whether your plugin needs an update, just look for it to turn orange
Depending on the type of plugin you are thinking of tinkering with, if you are ever unsure, or would like some assistance, please feel free to reach out to our team – we’re always happy to help.
WP Core Automatic Updates
We have three different options for automatic updates within your WPO Portal, we most often recommend the middle option as it updates a couple weeks after the initial update is pushed, allowing developers time to make changes to any errors that may have occurred. You can find this area via your WordPress tab of My Sites under Automatic Updates.

Cloudflare Enterprise
For those looking to utilize the strengths of Cloudflare Enterprise, as well as boost Core Web Vitals, improve page Speed, and increase your overall WordPress performance, we now offer Performance and Security Addon Packages.
Within the Cloudflare option of My Sites, you will be able to view and select an enterprise service. By default, you automatically receive a basic Cloudflare package, but Cloudflare Enterprise and our Cloudflare Analytics Dashboard are only available through our WordPress Speed Optimization Services (Performance & Security Addon Packages).
Admin Security Lock
As you have heard us say before, keeping your WordPress website secure is of the utmost priority, which is why we have created a WordPress Admin Page Lock adding on an additional layer of security to your WordPress admin area.
From inside your WPO portal you now have the option to turn the WP Admin Page Lock on or off under My Sites >> Security >> WP Admin Page Lock.
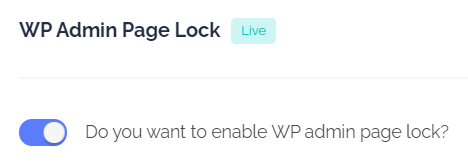
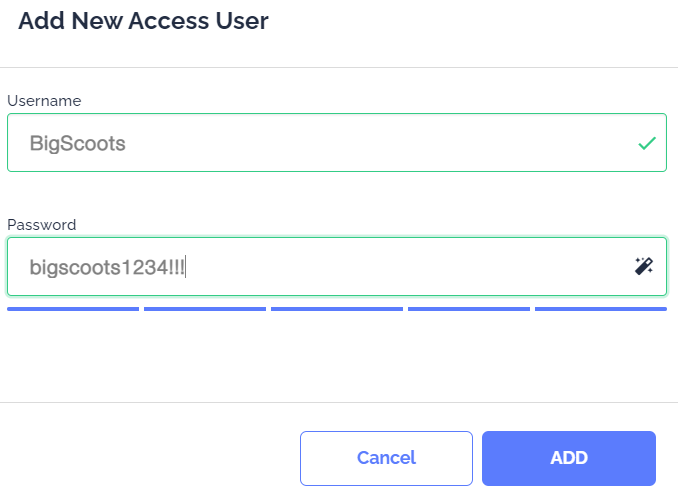
Once selecting the option to turn on the WP Admin Page Lock, you will be prompted to Add New Access User where you can enter in the Username and Password you’d like to use.
Once completed, each time you visit your WordPress admin dashboard via yourdomain.com/wp-admin you will be prompted with a dropdown to enter in the Username and Password you created.
Block IP Addresses
From within your WPO Portal you now have the option to Block IP Addresses from right under your My Sites tab by clicking the Domain >> Security >> Block IP.
You can then enter in the specific IP or IP-Range that you would like to block by clicking Add New IP Block. You’ll also notice a guide defining the appropriate format to enter in the IP you would like to block.
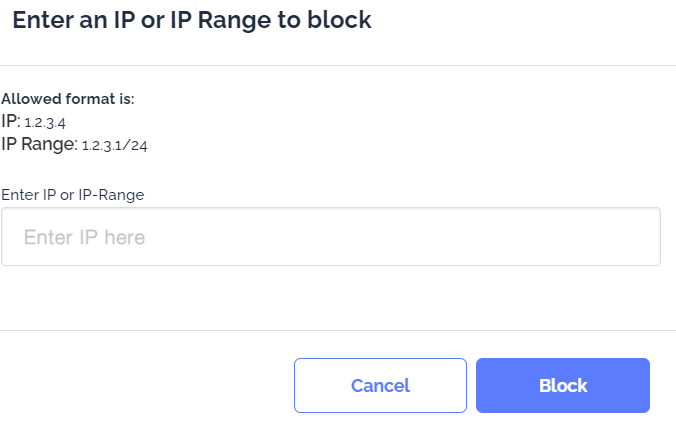
Once completed, you’ll have access to the full list of blocked IP’s at any time inside your WPO Portal and any previously blocked IP can be removed ay any time you’d like.
SSL
SSL, AKA Secure Sockets Layer, is used to add an extra level of security to your site(s). It is especially important for you if your website(s) carry sensitive information or if it is receiving sensitive information from other parties, such as credit card numbers or any type of personal information.
Your WPO Portal gives you the option to alter your SSL type if you wish however, it is very important that you understand the benefits and potential risks associated with the various types before making any changes. You can find this within My Sites >> Click Domain Name >> Security >> SSL.
Understanding the importance of SSLs and with Google demanding SSLs since July 2018, we provide free SSLs automatically configured on every single Managed WP Service we deploy.
Managing and Adding New Page Redirects
Managing and adding new redirects can be necessary if you’ve updated your website name, changed the location of a particular post, removed dates from your URLs among many other reasons.
Within our WPO Portal, via clicking My Sites >> Domain Name >> Redirects, you can implement redirects directly into the server config, completely avoiding the use of a plugin.

Depending on your URL structure and the type of redirect you’re wanting to implement, this process can become quite complex. If you have any questions or concerns about the process, please feel free to reach out to our team, we are always happy to help in any way that we can!
Domain Nameservers (DNS) and Cloudflare (CDN)
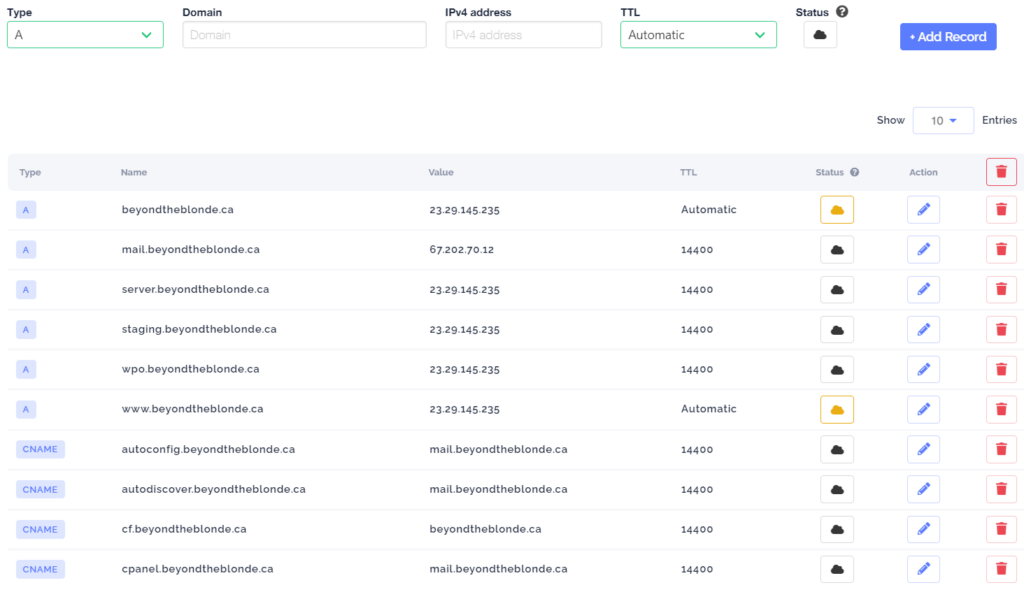
Cloudflare is our preferred CDN (content delivery network) of choice and also serves as a redundant DNS (domain name system) management service – adding enhanced security and performance improvements to your site(s).
Cloudflare is set up and entirely managed by BigScoots during your migration. You will find your Cloudflare details available from your My Sites tab, under the DNS option. Even if you had a preexisting account before your partnership with BigScoots. We are always happy to perform any necessary DNS changes for you – just let us know! 🙂 – however if you wish to perform any adjustments yourself, you have full and complete access in your DNS records page
Managing Server, Browser and Network Cache
At BigScoots we use different forms of caching in order to speed up and optimize your site. Caching is a critically important part to any efficient and well performing site.
Depending on your workflow and development routine, it may be necessary for you to clear this cache from time to time from your live environment. At any time you are free to clear your OPCache, Page Cache, Object Cache, All Server Cache as well as Cloudflare Cache.
In order to find this you will want to go into My Sites >> Click Domain Name >> Clear Cache.
Note: staging sites never have caching enabled.

Do keep in mind, that although the WPO Portal gives you option to manually clear your site(s) cache with a single click at any time, if you are the least bit weary about doing so, or would like some additional insight and direction on a particular issue you believe is related to caching, please feel free to reach out to our team here at BigScoots – we are always happy to assist!
Fix phpMyAdmin and Permissions
This area was created in the event that you are having problems accessing phpMyAdmin, or if there is incorrect ownership or file permissions. You can access it via My Sites >> Utilities >> Tools.

PHP Error Logs
As a developer or site owner it can be super helpful to spot which plugin or even more specifically which script is causing an error that could be causing an entire site to go down or certain functionality to fail.
From your WPO Portal within My Sites >> Utilities >> PHP Error Logs, both you and your site’s Collaborators are now able to quickly and easily access your PHP Error Logs, and on a site-by-site basis if you have more than one WordPress site.
If resulting from an update these details will allow you to quickly browse to the Plugin sections within your WPO Portal, where you can deactivate or revert the plugin to its previous version, or easily restore your site from a Backup.
Of course this is only meant to be a tool, if you instead would prefer to rely on our support and hands on management, we’ll always be here to help 🙂
PHP Settings
Within your WPO portal, under Utilities >> PHP Settings you may set up the settings for your PHP including changing the numbers for memory_limit and max_execution_time.

Managed Backups
Our managed WordPress plans provide you with automated backups which are stored off-server and off-network on our dedicated backup appliances for added redundancy. Each backup is taken around midnight (CST) and kept for 30 days, giving you a massive 30 unique restore points.
You can find these via the Backups tab on the left hand side of your WPO portal.
You are also able to manually take additional backups when ever you wish, we provide the ability to manually generate 5 backups however if you need additional you can always request them. Each backup is of your entire site and can be restored at any time.

If you enjoy keeping a local backup, you now have access to easily download either an automated or manual backup at any time. These backups are maintained for each WordPress site you have with us as well as each staging site.
Collaborators
No matter your workflow or team size, it is always critical to be able to collaborate effectively with key members of your team.
Within your WPO Portal by clicking the Collaborators tab on the left hand side, you are able to quickly and easily share access to others on your team, giving them full or restricted control over your BigScoots account.
What does this mean?
As you begin the process of adding a collaborator to your account, you will be given the opportunity to restrict their access to either individual domain names or to your entire account.

Any collaborator you choose to add will receive an email confirmation. If they don’t yet have a WPO Portal account they will be given the opportunity to create one, and if they do, they will be sent a notification to log in to accept your collaboration request. Up until your collaborator accepts your request, your collaboration will be pending in your dashboard – while pending or any time after, you are completely free to change the domain access or remove the collaboration entirely.

While you permit your collaborator access to your account, they will have the ability to view your active services and domains, access our hands on and always available support team, submit migration requests, perform manual backups or restore from backup, build staging sites as well as push and pull between them, view FTP details and create new FTP accounts, add redirects, create fresh or cloned WordPress sites, view site traffic, make DNS adjustments, view usage data, and much more!
As a collaborator, you will be able to view all of the sites you have access to right from your dashboard, as well as be able to immediately access them with a single click.

Partnerships don’t always last, and circumstances always change. If you ever need to remove a collaborator from your account simply click on the collaboration you wish to remove and proceed.

We understand the importance of consistency when it comes to branding your business, and having an email address that corresponds with your company name can be a major aspect of that.
You are now able to create unlimited email accounts from right within your WPO Portal, for free!
To access your email you will want to click the Email tab on the left hand side of your WPO Portal. You will want to click ‘Activate’ in order to get Started’.
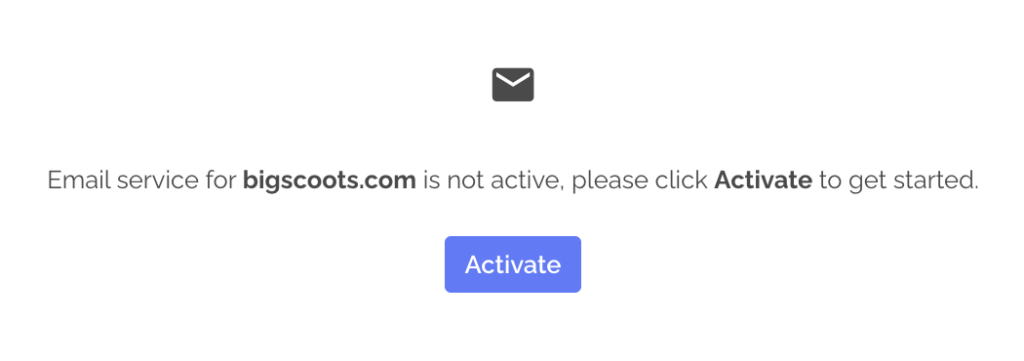
As you begin the process of adding a new email account, you will be prompted to select the domain you would like to generate the account for, along with creating a username and password.

Our fully managed WordPress hosting services provide an additional 10GB for email storage that is completely separate from your WPO storage. If you choose to create more than one email account, you have the option to allocate specific amounts of storage to each.

Upon completion, you will have free range to check your email via Webmail and to manage your email account(s) from right within your WPO Portal.
UPDATE: If you’d prefer to migrate an email account over yourself, you now have the ability to sync an old email account with your WPO email service.

Many of you may choose to use Gmail for your email hosted with BigScoots and/or to use the mail app on your cellphone. Simply click CLIENT SETUP to be guided to detailed instructions that have been written by our amazing team.

UPDATE: You are also able to create forwarders between existing email accounts and from a non-existing email account to an existing one.
As you begin the process of creating a forwarder, you have the option to forward one account to another within the same domain name, or to forward an account to that of a different domain.

You will be able to view all of the email accounts and forwarders that you have created right from your dashboard, as well as be able to immediately access them with a single click.
If you ever need to remove an email account or a forwarder, simply click on the account you wish to remove and proceed.
We have and will continue to work diligently to build a feature rich and secure WPO portal with the aim of empowering our clients to make full use of their service here at BigScoots – designed ultimately to enable our mutual long term growth and success. Happy WP’ing!

Written by Scott
CEO & Co-founder

